 |
| Old MP3086 |
 |
| New MP3086 |
So of course with anything new you need to follow Dave from EEVBlog's advice.. Don't turn it on tear it apart so that's what i did..
 |
| Cover off, transformer looks nice doesn't it ? |
Okay so first impressions from the photo above.. Nice secure soldering on the mains connections, shake proof washers on the earth wire and extra covering on the mains feed, see that black rectangle on the right centre ? Here it is closer up...
 |
| Switch Close-up |
It is a real clunking power switch on the mains, so no standby current usage, Yay a thumbs up..
 |
| IEC socket with integrated fuse holder, nice one ! |
 |
| Shake proof washer a point for Jaycar |
 |
| Spring washers on transformer mounts with intake vent for fan, there is also vents on the sides with exhaust at the rear of the unit |
 | |
|
- Rectifier board Power transistor board with Relays to switch taps from transformer to transistors
- LCD Display board
- Keyboard Board for buttons
- CV/CC Control board
- Connection board for front panel outputs with current shunt for amps readings
 |
Rectifier Board with room for two more transistors
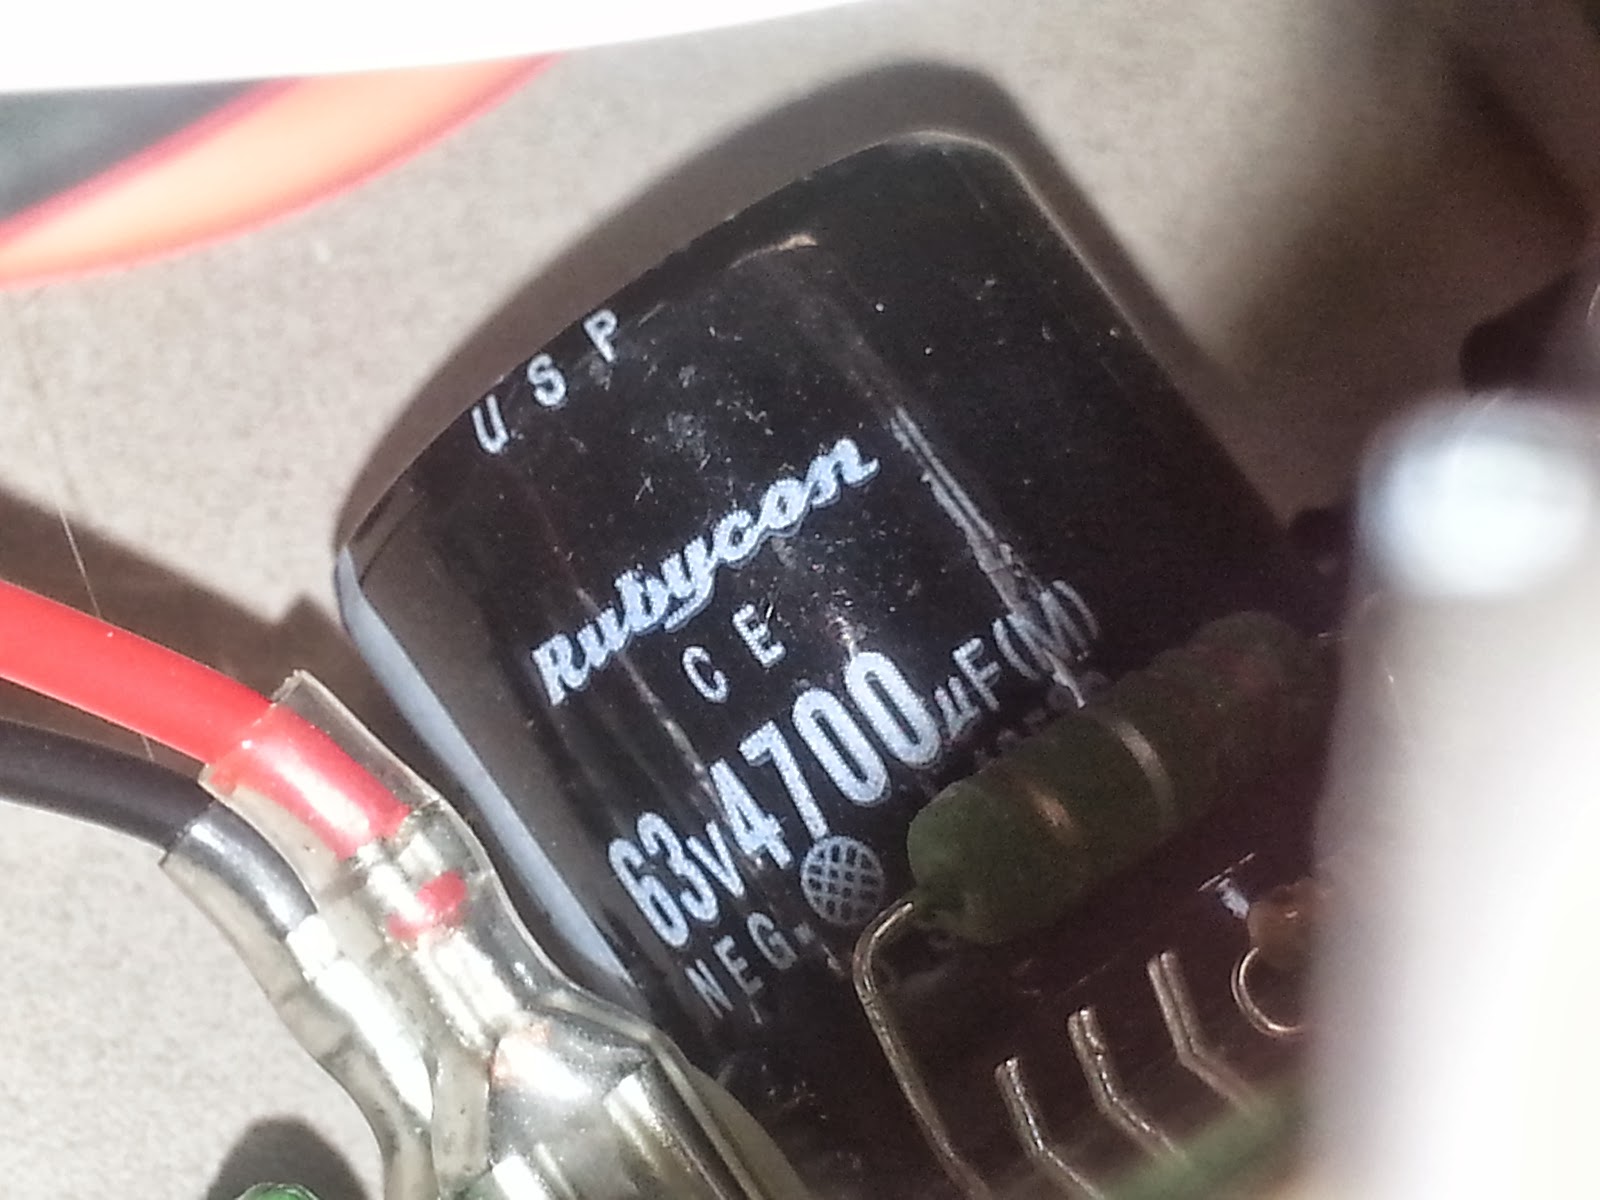 |
| Is this a real Japanese Rubycon or a copy ? |
The Main Power board looks like it has a real Rubycon capacitor, the screen printing looks good and it does not look like a rip off
 |
LCD Control Board all SMD, the bodge wires on the right run to the back light, keyboard board bottom left with ten turn pot for volts selection underneath

The Voltage and Current control board, there is nothing on the other side apart from a few through hole caps and a voltage regulator on a small heat-sink, notice the flux residue on the through hole hand soldered joints, not good how hard is it to clean a a board ? Here are some close ups of the cruft left behind after soldering. But hey the Ningbo QJE company gave us their phone number if you want to call and complain to them about it :p
 |
 |

 |
NXP Chips a counter IC and a logic gate, some more quality parts to go with the Rubycon cap...


Nice SMD soldering, re-flowed not hand done ! This is one of the trimmers to calibrate it all

Nice thick bus bars to the connections on the front panel with shake proof washers as well, excellent job.

Thermal switch for the fan, wired in series with fan it is rated at 5 amps and 50 C cut in temperature but cuts in before that,
Okay now for some testing....
The test set-up consisted of the following.
- RS232 connected DMM logging temperature
- Galaxy Note 2 Smartphone for dB readings (Not real accurate but okay)
- Incandescent 12V globe as resistive load
- Digitech QC1932 25MHz DSO
- Supply set at 6.9 Volts, this just switched to the second tap (6.8V) so max heat from transistors

12 Volt Light globe pulling 1.33 amps at 6.9 volts, this tested at about half of the maximum amps and the second tap on the transformer had just switched in at 6.8 volts so I was dissipating the most heat for this amperage in to the heat-sink.
The test set-up, I connected the scope probe to the terminal block on the front directly, I just hadn't done it here yet


Below is the capture of power on unloaded, there is a small HF ripple at power on then ramp up to full voltage (5VDC) with no overshoot, there is a small amount of ringing when it reaches the set voltage, from power on to stable voltage is about 10 milliseconds.

This is a close up of the spike at power up unloaded, about .5-.75 volts lasting 206 microseconds

Here is a capture of a loaded supply at 7VDC from turn on to full output is 76 milliseconds with no overshoot to speak of.

1.6mV ripple at 7 volts under loaded conditions

dB levels with phone acting as meter with smart tools app. The first bump is me pressing the power switch, the second is the mechanical temp switch clicking in, then you can see the fan ramp up to 69dB. the phone was sitting 10cm behind the PSU with the microphone sideways to the fan, the power switch click is quieter as it is at the front while the temp switch was closer to the rear. The ripples in the graph is just background noise in the shack.

If you look between the cursor marks on the timebase below you can see two little ripples lasting about a second, this was when the fan switched in but was brief and low in amplitude. It may have just been induced noise from the arcing in the mechanical temperature switch for the fan as its contacts closed.


Here is the temperature run at 7VDC 1.33 amps from cold (I did this test first after leaving it off overnight) Starts at about 26c the shack temp, ramps up to 43.9c in about 2 minutes then settles to around 34c and stays there. I ran it longer then this graph loaded and the temp was stable and didn't run away at all which it shouldn't pulling 9 watts from a 90 watt supply.

All in all for the price I am very happy with it, well built steel case, the front panel is plastic but has steel rails running from it to the back panel for support.
So what don't I like ? Well not much the only things are as follows.
- Earth Connection is in the centre, so I cant plug a standard spaced dual banana plug adaptor in to the - and + rails, I may re arrange the banana sockets and move the earth to one side.
- You need to short the rails to set the required amperage for CC mode, I am going to put a NO momentary switch on the front so i don't need a lead to do it
- Switching on CC mode is a bit hit and miss, I dont know if it is key bounce or a slow micro but you have to press the CC button a few times before it locks in to CC mode, it is a soft switch
Apart from that i really like it and it actually goes to 31.5 Volts
MP3086 Regulated lab Power Supply 30VDC at 3 AMPS
Jaycar Electronics http://www.jaycar.com.au/productView.asp?ID=MP3086
List price $199 AUD
No comments:
Post a Comment